OpenNebula contextualization is a system that writes VM configuration parameters into a CDROM image and a package installed in the VMs that is able to configure the system using this data. By default comes with scripts to set the network configuration (IP, DNS), hostname, allowed ssh keys, etc. You can even easily create your own version of the packages with new scripts that configure other parts of the system as stated in the documentation. Still, if you don’t want to create you own context packages you can specify scripts to be started at boot time. In this post we will provide an example on how to use this system to prepare the machine to be configured with Puppet but these tips are useful for any other CMS.
The requisites for this example are:
- An already installed Puppet master in a network reachable by your VMs
- CentOS 6.x base image with context package >= 4.4 and internet connection
To make the VM be configured as soon as the Puppet agent is started you can change /etc/puppet/puppet.conf in the Puppet master machine and set autosign = true in main section (remember to restart the daemon). This way you wont need to sign the certificates manually:
[main]
autosign = true
In case you are not using autosign you should use the puppet cert command to sign new host certificates and wait until the Puppet agent in those nodes wakes up again. By default they do it every 30 minutes.
The installation and configuration of Puppet agent in the nodes can be done with the aforementioned init scripts. We can add this script to the files datastore. I’ve called it puppet_centos:
#!/bin/bash

PUPPET_MASTER_NAME=puppet.opennebula.org
PUPPET_MASTER_IP=10.0.0.2

if [ -z "$NODE_NAME" ]; then
    NODE_NAME=$(hostname)
fi

# Add node to /etc/hosts
echo "$ETH0_IP    $NODE_NAME" >> /etc/hosts

# Add puppet server to /etc/hosts
echo "$PUPPET_MASTER_IP    $PUPPET_MASTER_NAME" >> /etc/hosts

# Install puppetlabs repo (for latest packages)
rpm -ivh https://yum.puppetlabs.com/el/6/products/x86_64/puppetlabs-release-6-7.noarch.rpm

# Install puppet agent package
yum install -y puppet

cat << EOF > /etc/puppet/puppet.conf
[main]
vardir = /var/lib/puppet
logdir = /var/log/puppet
rundir = /var/run/puppet
ssldir = \$vardir/ssl

[agent]
pluginsync      = true
report          = true
ignoreschedules = true
daemon          = false
ca_server       = $PUPPET_MASTER_NAME
certname        = $NODE_NAME
environment     = production
server          = $PUPPET_MASTER_NAME
EOF

# Enable puppet agent
puppet resource service puppet ensure=running enable=true
Make sure you change Puppet master IP and name.
Now in the template for the new VM you will have to add some bits in the context section:
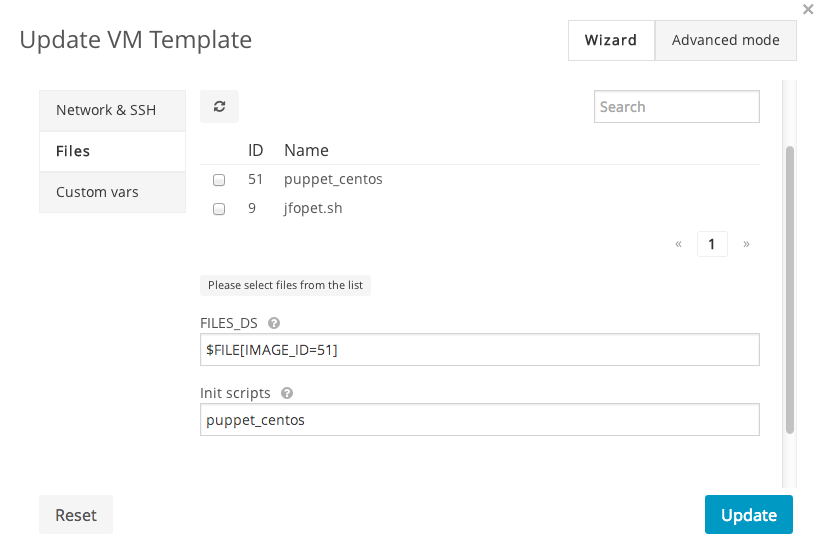
puppet_centosscript in files (FILES_DS) section- set the “init scripts” value to
puppet_centos
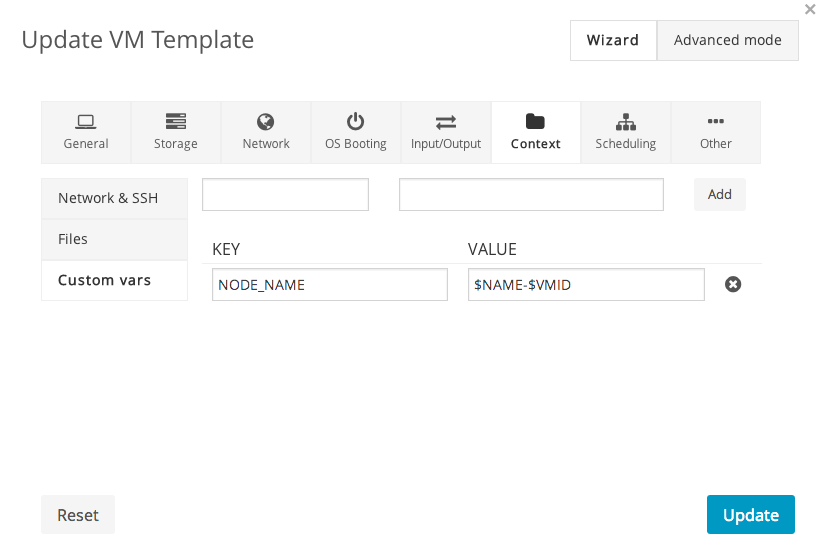
- add a new variable called
NODE_NAMEset to$NAME-$VMID. This way the node name for the VM will be the same as the OpenNebula VM name.
If you are using the command line the context section will be something similar to this:
CONTEXT=[
  FILES_DS="$FILE[IMAGE=puppet_centos]",
  INIT_SCRIPTS="puppet_centos",
  NETWORK="YES",
  NODE_NAME="$NAME-$VMID",
  SSH_PUBLIC_KEY="$USER[SSH_PUBLIC_KEY]" ]
Now we have most of the bits needed to do the automatic configuration of the VMs after boot. It is only needed to add configuration to the nodes.
Since we are working with Virtual Machines we won’t know beforehand the name/IP of the new VMs that we can refer to when selecting the role of each one. To overcome this limitation, and taking advantage of OpenNebula name generation, we can define the node names in Puppet master with regular expressions so we can tell the roll of these VMs. For example, in /etc/puppet/manifests/site.pp we can define this node:
node /^www-\d+/ {
    include apache
}
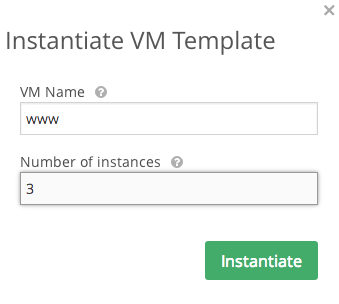
Now when instantiating the template we can provide the name www. OpenNebula will add the VM ID to the certname so we will have www-15, www-16 and www-17, for example. All these node names will match the regular expression and install apache.
In case you are using the command line you can use this line, changing centos_template by the name or ID of your template and 3 by the number of VMs you want to instantiate:
$ onetemplate instantiate centos_template -m 3 --name www


Excellent post! We do something very similar in our environment, utilizing the init scripts for deploying puppet, then defined manifests for pushing the configurations down. Works great for nearly hands-off configuration of your entire environment (so long as your Puppet code is well-written. ;-p ).
Great and helpful post!
Nice sharing, and thanks!
A problem you’ll have doing this is that if you resubmit/recreate a VM with the same name, the certificate will still exist on the puppetmaster, but won’t match the host cert. As such, puppet will fail with a big pink ‘bad cert’ message.
We have addressed that by adding the following to the puppet master config, in auth.conf:
path /certificate_status/

auth any

method find, save, destroy

allow *
Then we use CURL to call out to the puppet API to remove the cert .. we do this as part of the puppet context script, as well as part of automation (shutdown automation, etc).
curl -k -X DELETE -H "Accept: pson" https://$PUPPETMASTER:8140/production/certificate_status/$HOSTNAMEBill Campbell: Sure, the hard part here is the configuration.
Todd: Thanks for the tip! I didn’t have that problem but also I didn’t start that many VMs.