With the release of OpenNebula 5.8, official support for LXD containers was added to the driver stack. It is possible now to create containers with a very flexible approach, using regular VM images and apps from both OpenNebula and linuxcontainers.org marketplaces, etc.
However, there is a strong limitation to the support of virtualization nodes. Currently, there is only support for the setup of an LXD node with Ubuntu >= 18.04. That could impose a limitation for users who prefer/have Debian or CentOS. The good news is that limitation may be overcome by using full virtualization with the KVM driver.
In this post we are going to create a single node opennebula setup. That host will have CentOS7 installed and will act as a regular KVM node. We will create an Ubuntu 18.04 VM, in the same network as the frontend, and then we’ll add that VM as an LXD node.
This nested virtualization approach renders additional benefits because of the complete decoupling of the containers from the hypervisor layer, namely:
- Increased Security
- Live-migration of the container workload
- The ability to use any infrastructure no matter the OS or its location (private or public).
Let’s get started.
Create the environment
- Get yourself a CentOS 7 server
- Deploy OpenNebula there, miniONE is the perfect tool to do so.
Prepare the LXD VM
Import Ubuntu 18.04 – KVM from the OpenNebula Marketplace
[root@LXDoCentOS ~]# onemarketapp list | grep 18.04
  15 Ubuntu 18.04 - KVM        5.8.0-1.20  2.2G  rdy  img 02/26/19 OpenNebula Public       0
   1 Ubuntu 18.04 - EC2        5.8.0-1.20    0M  rdy  tpl 02/26/19 OpenNebula Public       0
[root@LXDoCentOS ~]# onemarketapp export 15 'lxd_node' -d 1
IMAGE
    ID: 1
VMTEMPLATE
    ID: 1
Add the default NAT miniONE network to the VM template.
[root@LXDoCentOS ~]# onetemplate update 1
Then add
NIC=[
  NETWORK="vnet",
  NETWORK_UNAME="oneadmin",
  SECURITY_GROUPS="0" ]
It would be a good idea, when setting a long-term LXD host, to set a fixed IP address for the VM.
Make the image persistent

[root@LXDoCentOS ~]# oneimage persistent 1
Now deploy the VM and it is a matter of setting up an LXD node. You can easily follow the steps described in the documentation on the newly created VM. You can add the host with its IP address or create an associated name in the /etc/hosts file.
Starting some LXD containers
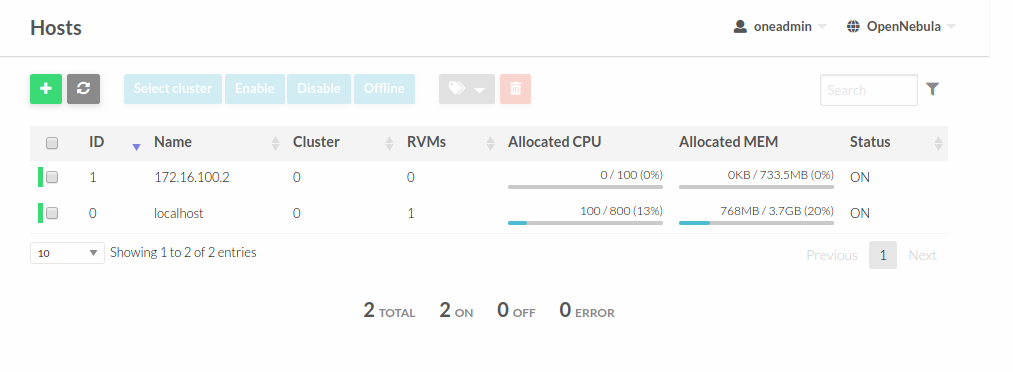
The VM 2 will be our LXD node created in KVM. You need to add it within the Host tab. Simply create a new host of type LXD with the VM IP as its name. In this case, the host 0 is the default one created with miniONE, and 1 is our virtualized LXD node.

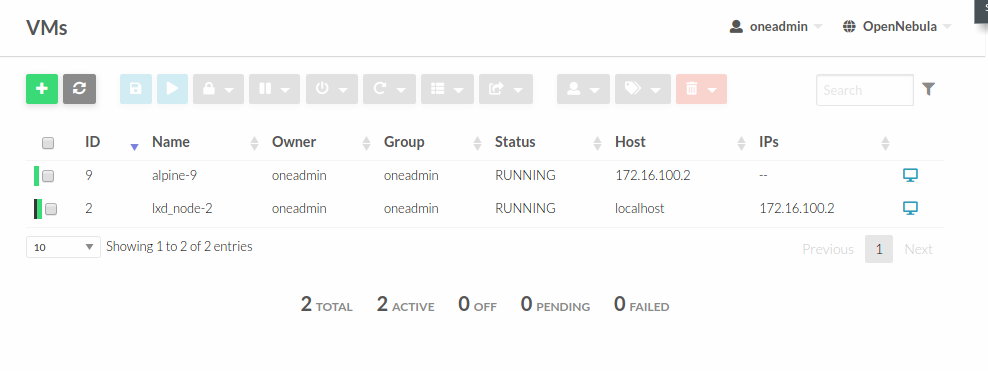
Now we are ready to start a new container as usual. In the image below, the VM 9 is an alpine container running inside the VM 2, our virtualized LXD node.

You can log into the LXD node to check our container. It may be a good idea to lock the LXD VM in order to prevent mistakes when using Sunstone.

It is as simple as that. If you have questions or comments, don’t hesitate to bring them up in our Developers’ Forum.


0 Comments